The Art of the Hunt

As an adult, causing us to live in adult spaces instead of studio apartments, I have been fortunate enough to have learned the value in putting together a cozy and eye pleasing home. It’s a great feeling to come home and see that the work you have done to make it feel like, well, home. As some of you know, my husband is in the military. This means that we have had a few moves under our belt and will surly have more. I get excited to put our house together and get settled in. My grandmother once shared a story with me about a friend of hers. The woman, like my grandfather, was married to a military man. They had moved across the country and everywhere In between. My grandmother asked her what she did to make their new houses feel like home. The woman told her that she had a certain set of curtains, and no matter where they moved, the first thing she would do would be to unpack and hang up those curtains. Her children, years later, told her that as soon as they came home from their new school, or meeting new kids in the neighborhood, and saw those curtains, they felt better. They felt like they were home. I feel that way about our house. I don’t have a certain item that comes with us to every house. But I do try to make our house feel like a home by making it feel comfortable and sanctuary like.
This go around, since we have the staples of furniture that has grown throughout our moves, I have turned my focus to accent pieces. I pride myself in being able to sniff out a great deal. My husband and I had a conversation about our generation and how we love to save money. Not having a ton to spread out, we like to find a steal. Whereas our parents before us sometimes found delight in spending a fortune on that custom, hand carved, European armoire for the guest bedroom, we tend to be elated at finding a great love seat for the living room for twenty bucks at our local flea market. This being said, I have made it somewhat of a challenge to myself to spend as little as I can and still make the rooms in my home look as if I spend some dolla dolla bills y’all.
I recently found some blogs and some great articles about placing item in your home. Picture frame galleries, bookshelves, entertainment centers, everything can be set up to look amazing. I thought I would share a few awesome finds that have come to live at my house. In my next post, I plan on sharing the placement techniques with you as well.
Before I start, Let me tell you know, my taste may not be your taste. Everyone is different. But around here, we like one of a kind pieces or those that are a little bit more unique. I like to blend everything I have, and I hate matchy-matchy. That may not be your jam, but it’s just how I feel. You don’t have to be friends with me, it’s okay I promise.
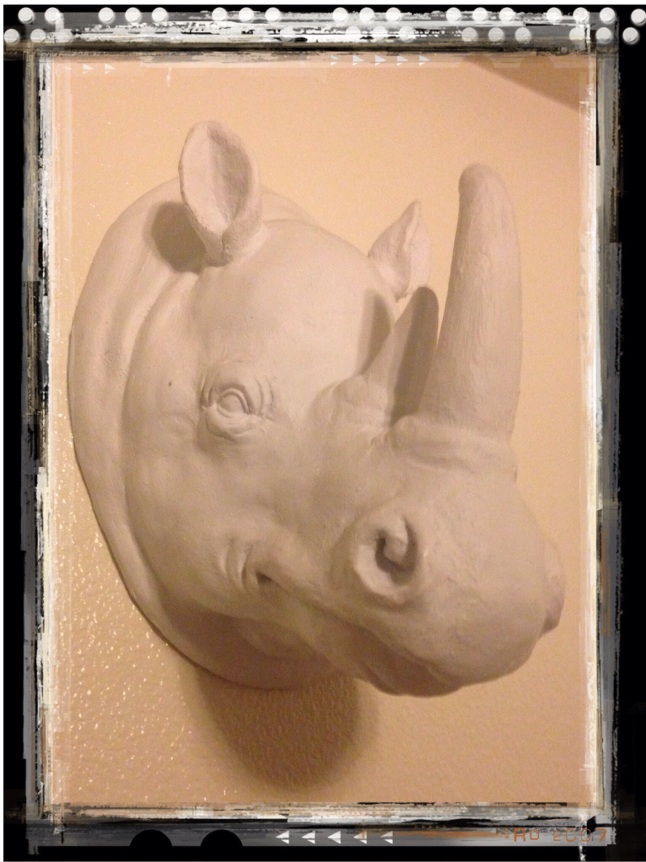
IMG_0007-0.JPG
I’ll start off with this amazing find. I found this poly resin rhino head at Ross for $14.00 plus tax. I saw it and thought, “You know what? Yes. This is happening…” Not only did I love it, it rivaled the rhino head i saw in my Restoration Hardware catalog the previous month. Albeit, that one was over $300… It was life size, and this little guy is obviously not. But to me, it is perfect and found a lovely spot right by our front door.
IMG_0002.JPG
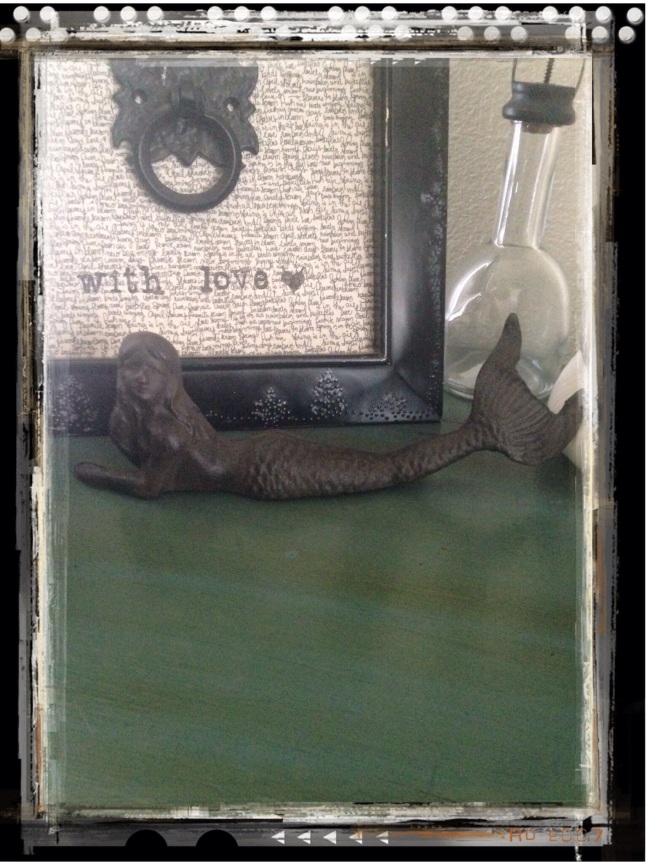
First of all, I think everyone should have a little luck in their home. Most people find Buddha statutes or bamboo plants to fill this role. I chose a mermaid. This little lady is iron, and even with her small size is heavy. I figure, even if she doesn’t bring us luck, I can use her to hit an invader and she will have proved her usefulness. I found her at a thrift shop for a little under $6.00. We don’t have anything nautical in our house, so I thought it was a change of pace and something a little different.
IMG_0006.JPG
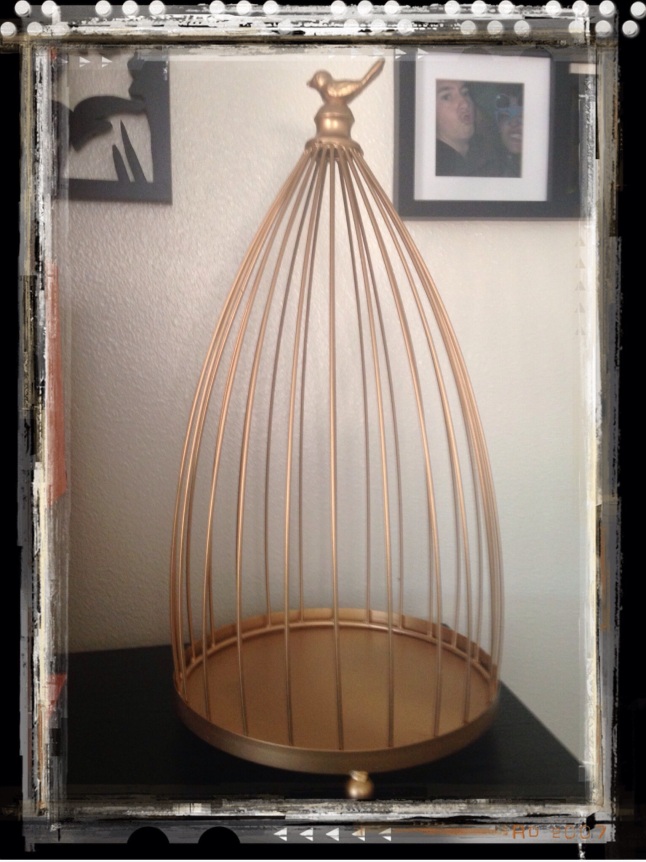
I found this birdcage at Hobby Lobby. They were having a 50% off sale on birdcages, lanterns and terrariums, so I paid about $12.00. I like this because it’s not your garden variety birdcage. It’s painted a bright gold and the cage lifts completely off from the base. The shape also intrigued me. It is triangular instead of cylindrical, and didn’t have a door. It’s found a spot on out dresser for now, but it don’t know if it will stay there.
IMG_0004.JPG
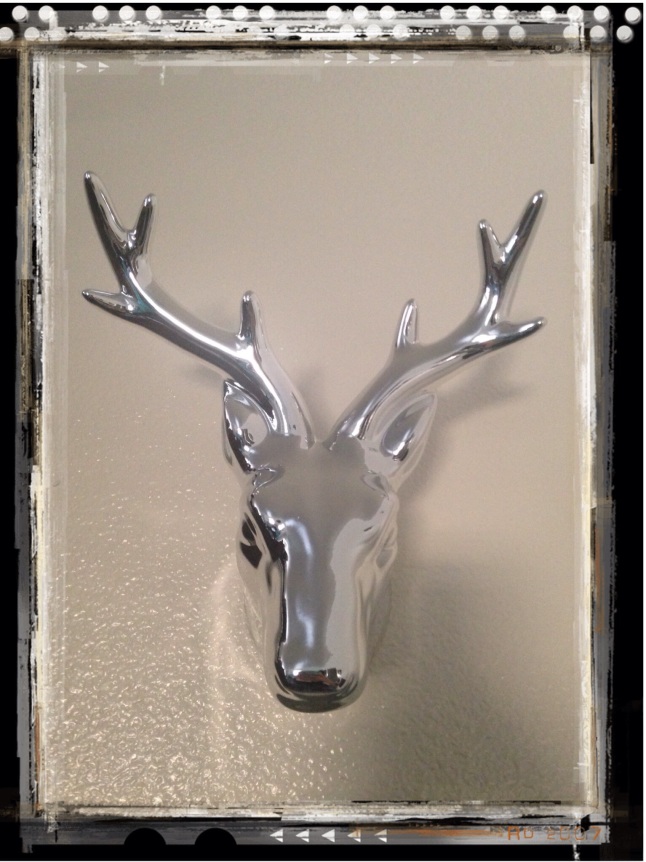
Here is another all piece. It is a small completely mirrored silver buck. I pick it up for about $11 dollars. Again, it mimicked another bust I had seen in a West Elm catalog, but for a fraction of the price. The one listed with them was roughly the same size, (about 8″x6″) but they were asking around $90 dollars. No thank you to that. This little guy is currently brightening up one of those hard-to-put-anything-in-except-for-a-floor-lamp spaces in between the two foot space of our entertainment center and the wall.
IMG_0003.JPG
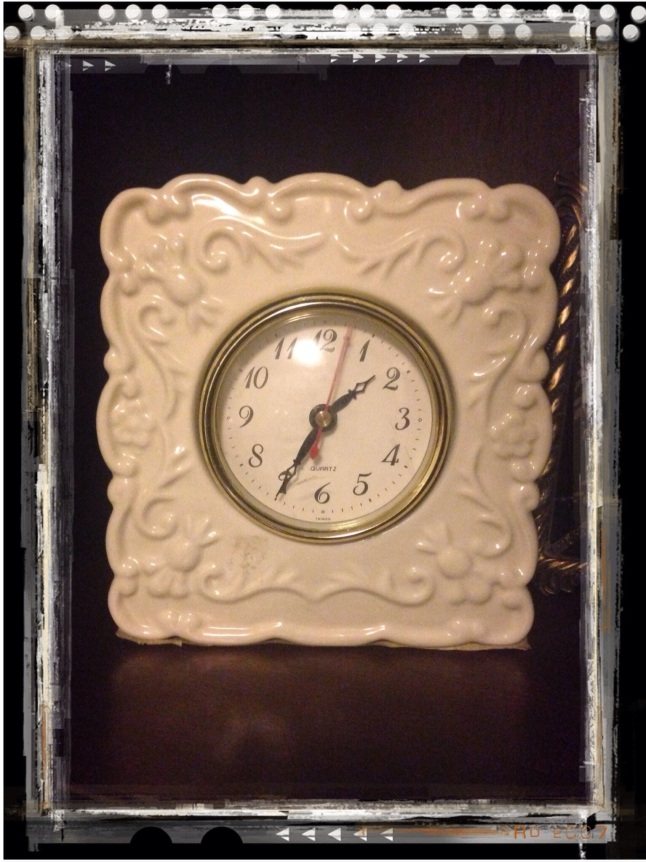
Clocks are hard for me. With the time shown digitally on most things around your home, there doesn’t seem to be a real need for any. However, I wanted to find a small glass one for a shelf on our entertainment center. And found one I did. I snagged this little beauty at the St. Vincent de Paul thrift store in Tacoma. Let me tell you, I love that place. It’s a bit of a treasure mine. You have to dig and really look everywhere, but I have never come away disappointed about my time spend there. I really like the simple design of this clock. The base itself is cream ceramic and the clock face can come out. There are pretty swirls and it was exactly the size and stay I wanted to find. The best part you ask? I bought it for $2 dollars. Yeah. No complaining here.
IMG_0005.JPG
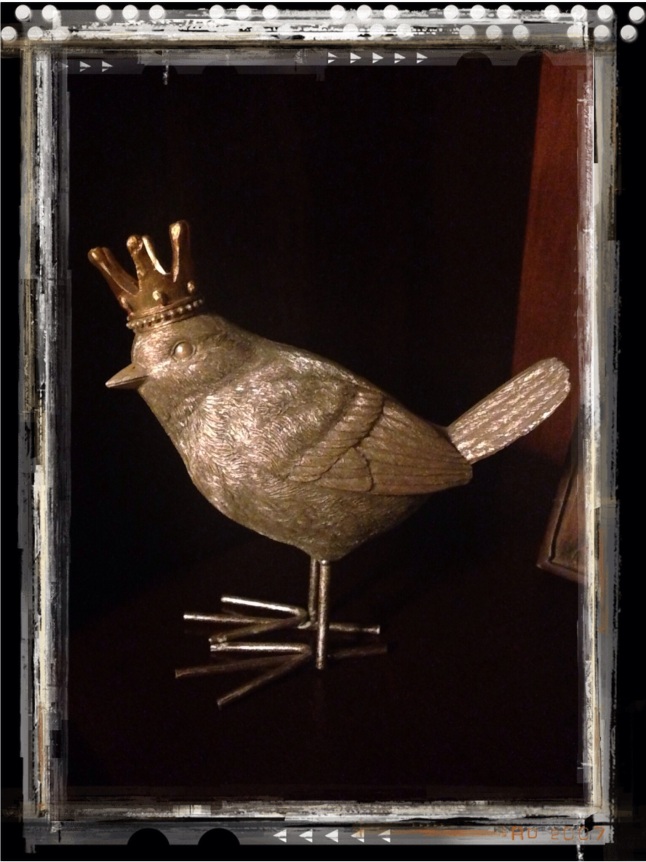
This sweet bird was found at Hobby Lobby (I love that place). It’s just a little guy with a crown. Obviously it needed to come home with me. I was there for fabric and just happened upon him, sitting there all alone, pleasing with me to buy him. He could I say no? I couldn’t, and for an extra bonus he was in the 70% off clearance and came to about 5 bucks.
IMG_0001.JPG
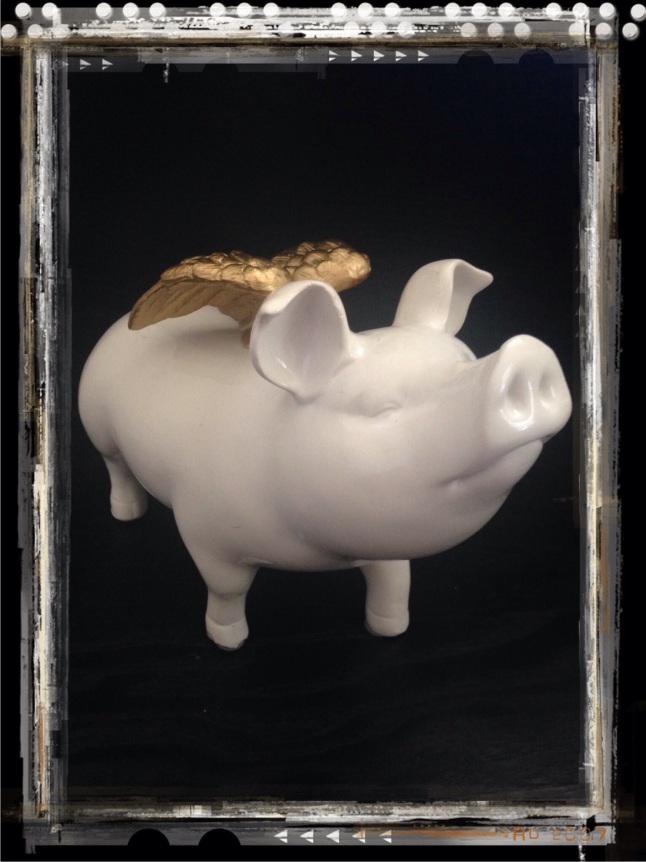
I saved my favorite latest find for last. I haven’t been able to really decorate our bedroom yet. I have a picture frame gallery dominating one of the walls and a few other art prints in there, but I have yet to fall in love with a style or really anything to fit in there. I was out with my husband one day looking for a new planter for some shamrocks I was transplanting, came around the corner and this dude was staring at me. We looked at each other and both slowly put our hands out to grab it. We were at Marshalls, and if you know anything about them, they usually only order two or three of something and then never order it again. I like this concept, something different and cute, but not something you will find in everyone’s house. He was a little over $8.00.
Finding unique items at a steal is part of the fun of shopping for me. I don’t go clothes or shoe shopping that often, because that kind of shopping is always stressful and tedious to me. But finding items for our home is what I love doing. It makes me happy to finish a room and feel so at home and cozy, like you’re in your own little world. Hopefully I’ll get my act together and take some photos of the arrangements I have made in our house. There is a art to it that I love, and find pretty comforting.
Until next time!

“You can’t just use stain willy nilly. On top of that, you don’t have a clue what you’re doing.

With work being busy, making a trip home and life generally being chaotic, I haven’t been able to finish my most recent project in a time frame that I would have liked. It took me over a month to get this little guy done. As I have said before, I love finding treasures at the Goodwill. If you have some time and have a bit of vision in you, you can find just about anything to makeover. Weaving in and out of people and looking at object from all sorts of angles, I have been able to find some rad items. If you are not already aware, Goodwill has two days a year where their stores are out of control. These amazing sales fall on Black Friday and the Fourth of July. Everything that is a donated good is 50% off, and I do mean everything. Odds and ends, lamps, frames and furniture are the things I like to look for. I found not one, but two amazing vintage record players. You know the giant consoles that have awesome detail and can double for a unique buffet or entryway table? Yes, I found two of those priced between $15.00 and $28.00, without the 50% off. I, sadly, did not have room for either of them (also, the hubs really advocated this point to me…). But that is just the kind of amazement that the Goodwill will always have in store for you. I am a BIG FAN.

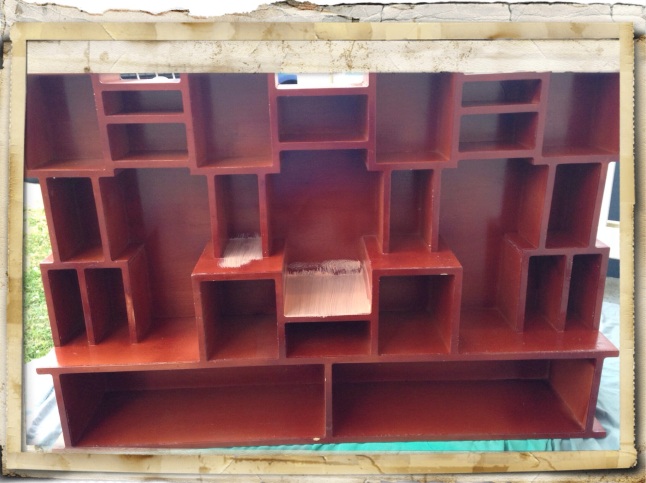
On this trip I found a few things for some side projects that I am working on for Christmas. On my way out I saw this interesting top to a secretary. It was all by itself, and I had an idea to remake it into a shelving unit to hang on the wall. It came home with me for the low, low price of 4.00.

IMG_0008.JPG
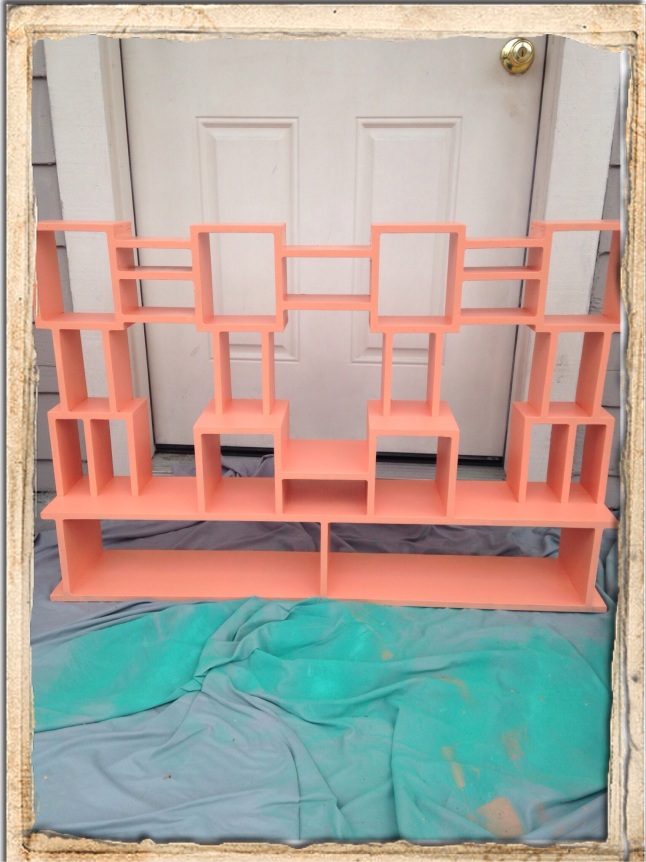
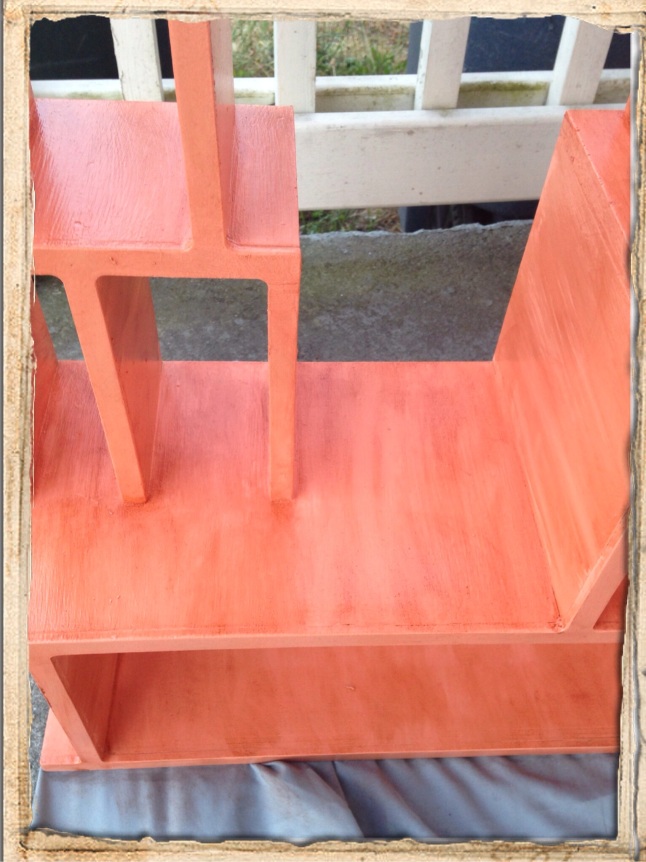
I forgot to take a before picture, and luckily remembered a few minutes after I started painting. I enjoy the look of this unit. It has a cool geometrical pattern and varying depths of the individual shelves. I quite like it.
In decorating our house this time around, I have moved away from the “each room has a color and/or theme” idea. We used to have deep greens and browns in our living room blues in our spare room, red in our kitchen and black and white in our bedroom. I feel constricted when putting a room together, and I put myself in that box. Since I have gone down this new path, I have been able to add some unique touches to our house that I really love that I wouldn’t have been able to do before. As for this piece, I chose a coral color. We don’t have anything coral. I wanted that to change.

IMG_0004.JPG
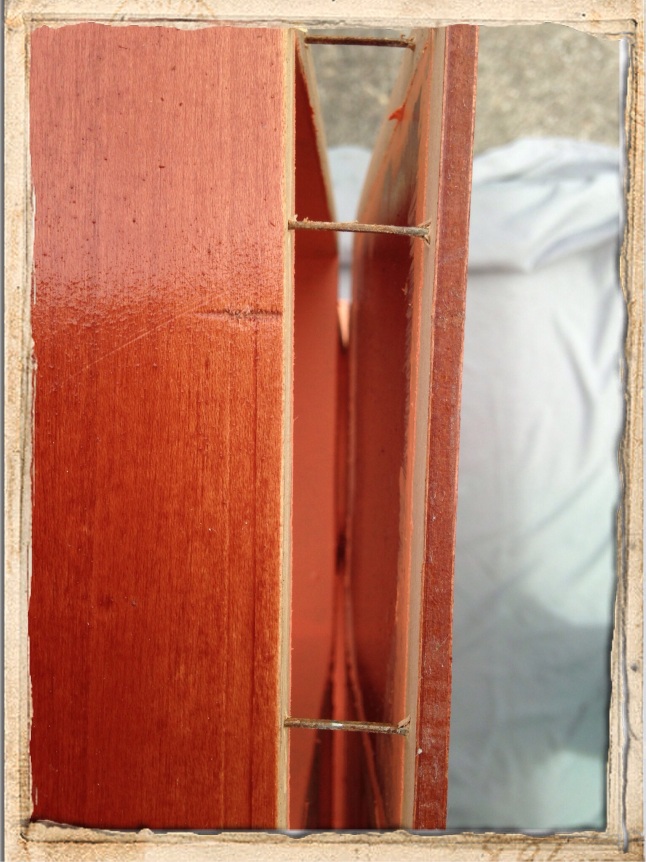
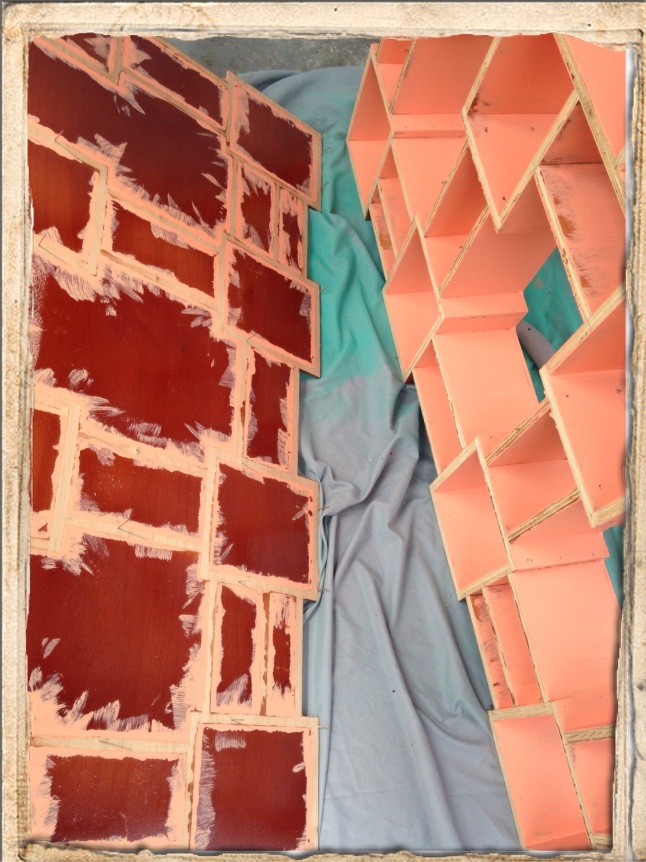
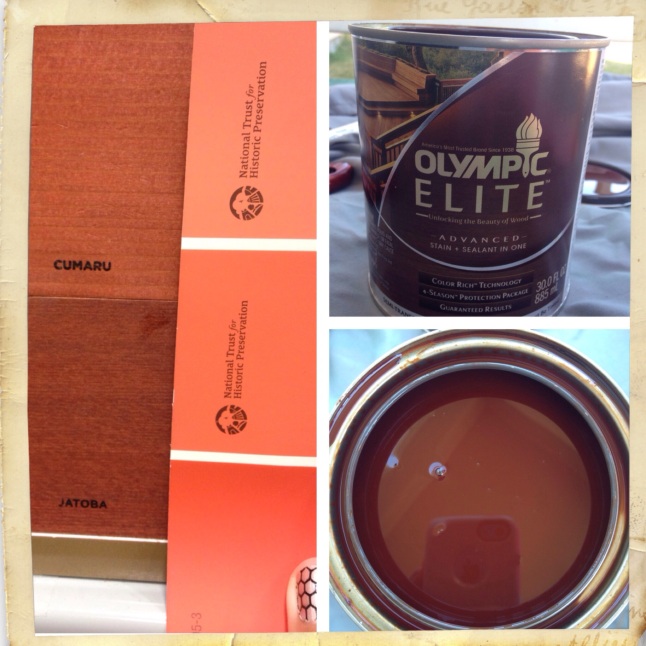
I chose Glidden “Tropical Coral” for the base. I had a different plan in mind for this piece outside of a straight paint face lift. I started painting and got about a coat and a half in when I decided that I wasn’t able to get the full coverage I wanted with the odd angles I had to work with. I took the back off of the unit with a small pry bar. I had to be careful, this piece is a bit old and I didn’t want to the nails to split the backing.

IMG_0020.JPG

IMG_0005.JPG
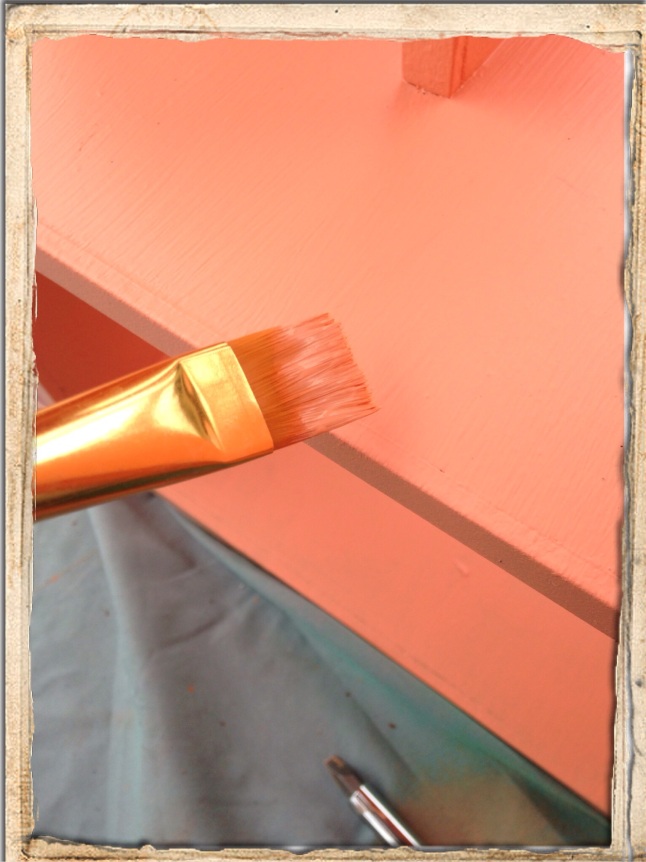
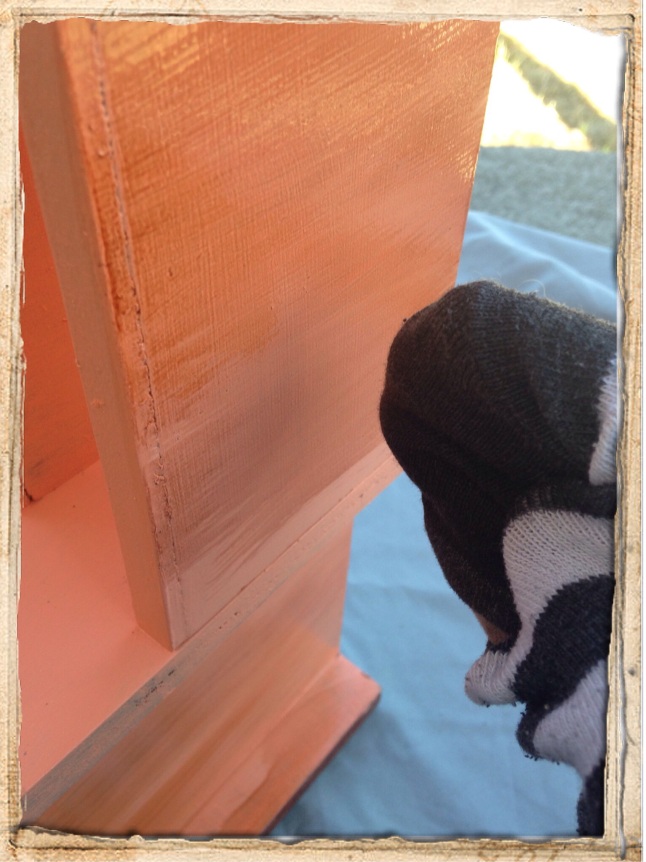
After that, it was smooth sailing. I was able to get great coverage and used a artists brush to get in the smaller and hard to reach areas. I really enjoy that tactic. The different shapes of brushes can really make a difference.

IMG_0010.JPG

IMG_0007.JPG
That being said, I didn’t mind if the paint wasn’t perfect. Like I said, I had a different plan for this project. I finished painting it and let the paint cure for about a day.

IMG_0011.JPG
The next part of my plan was to stain over the paint. I know, I know. This is not how things are done. I know this. The gentleman at the paint counter knew this, and told me so. When I asked where the gel stain was, he asked about what I was doing, and I told him. He told me that “You can’t just use stain willy nilly. You don’t have a clue what you’re doing.” I just smiled and handed him my color to mix and left it at that.

IMG_0006.JPG
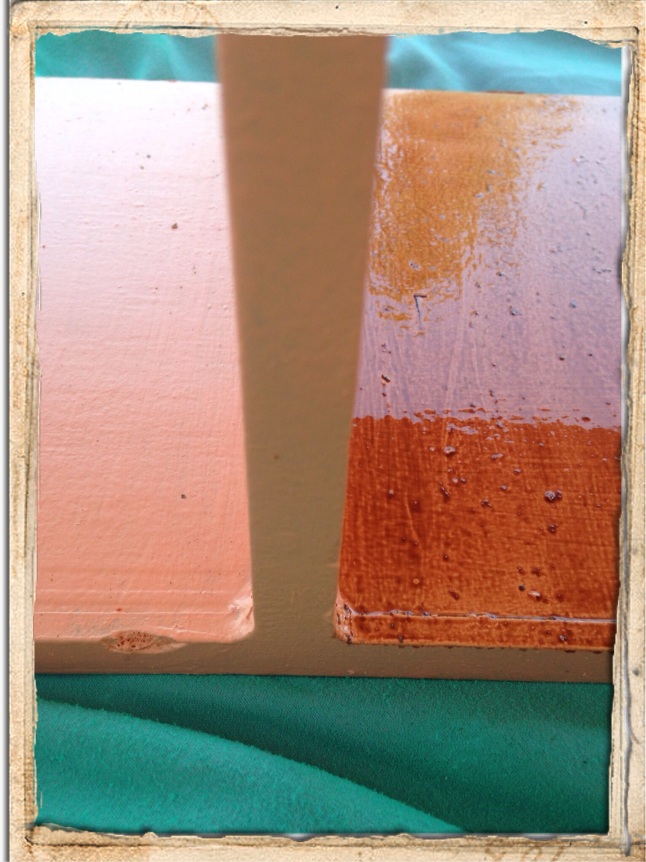
I used Olympic Elite gel stain in Jatoba. My plan was to overlay the stain on the paint, and then cover it with a protective sealant.

IMG_0009.JPG
As you can see, the stain is pretty dark. I used a sock to rub it along the paint into a streaked pattern. (That sock had it coming. I lost its mate forever ago and kept hoping to find it. Alas, I did not.)

IMG_0012.JPG

IMG_0013.JPG
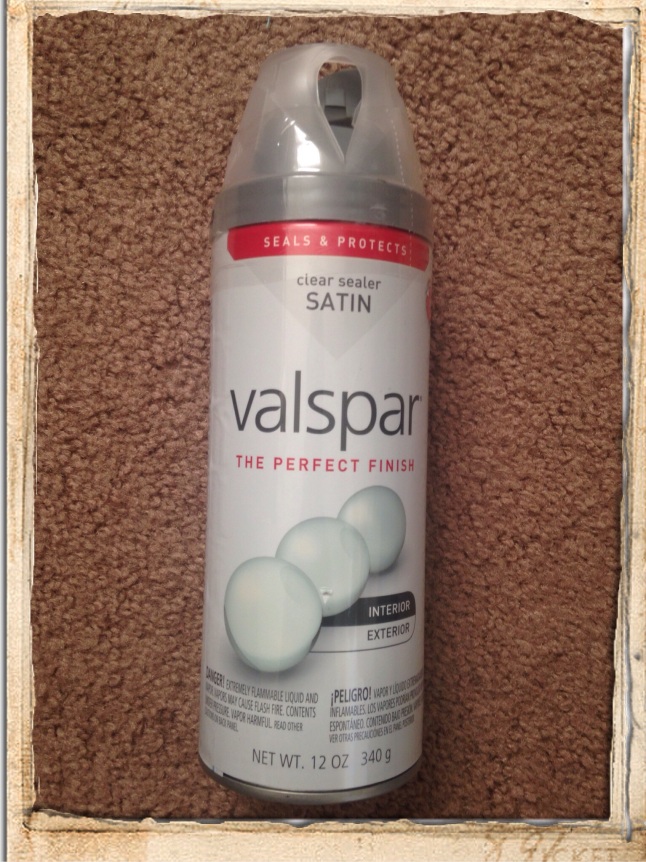
The finished product had this wonderful color to it. A rich brownish red paired with the light coral makes it look really cool. So basically, it came down to Kellie: 1, Lowes paint guy: 0. BOOM. After letting the stain dry as much as it could, I proceeded to seal it. I used a new sealant this go around, by Valspar. It was light and dried rather quickly. It also didn’t have the heavy odor that a lot of sealants have.

IMG_0014.JPG
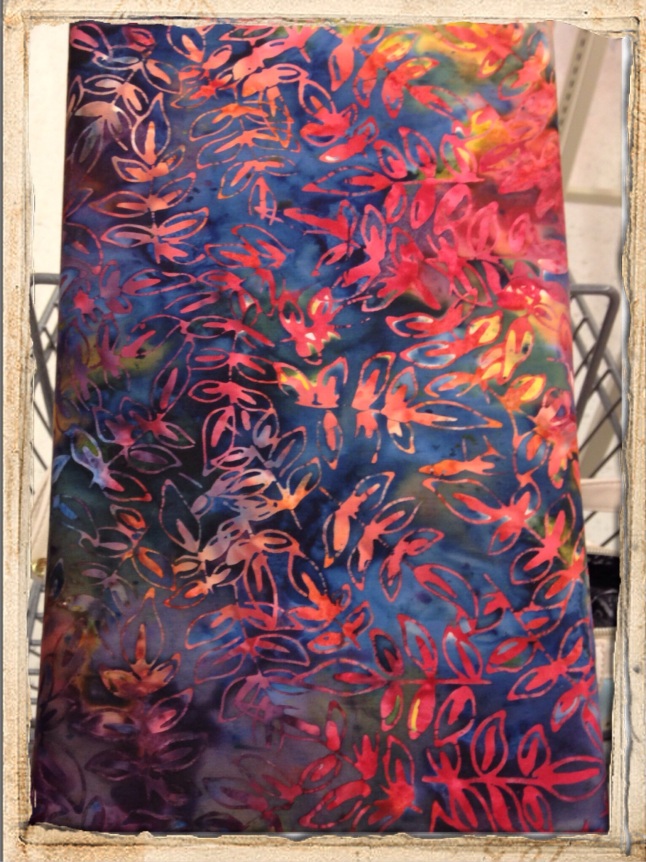
Now it was on to the fabric. I chose a batiste fabric for this job. Not the usual place for it, but I really enjoy the colors that these fabrics always have in them. They feel like paint stenciled on fabric, and usually don’t have a pattern per say. This one did, and it found that interesting. It picked up the coral of the paint and gave a few other really nice colors to bounce off of as well.

IMG_0017.JPG
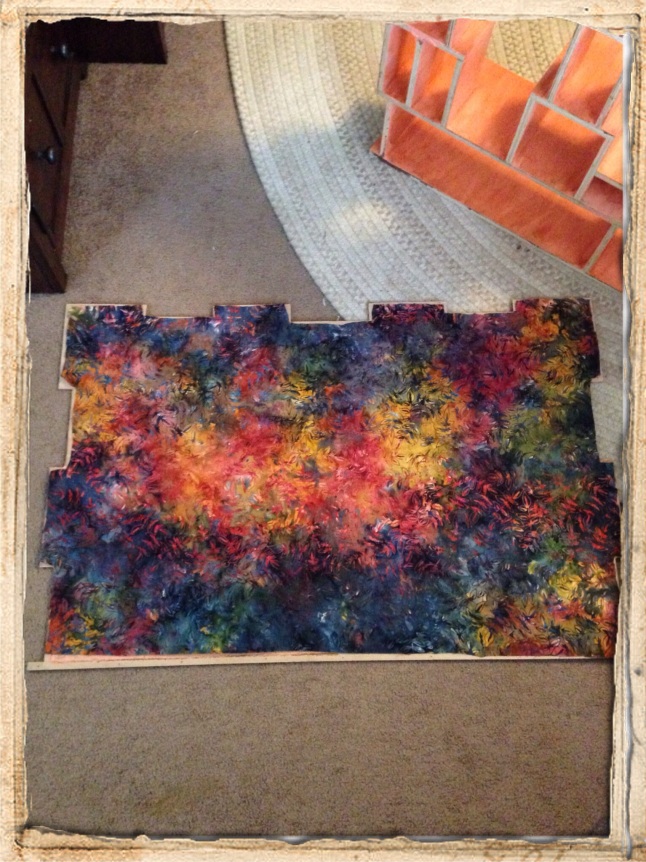
I laid the fabric on the back of the shelving unit, glued it down, and cut it to fit the shape.

IMG_0015.JPG
I hammered the back on again, and voila! It was an all new look for an interesting design!

IMG_0003.JPG
This project was a bit time consuming for me, but that is just because life got in the way. How dare it. I haven’t decided where to put this guy yet, so for now it is sitting on our dresser waiting to be filled with odds and ends brimming with character. I hope my next project won’t take so long, it’s really relaxing to hammer something out and make something new.

IMG_0002.JPG
Until next time!
“I know things. I’m hip.” Adventures in Geocaching the DuPont edition

As summer officially rolls in and it’s starting to get warmer, I have the urge to get outside and into something fabulous. Since we moved to Washington in the middle of winter, I have gotten used to the rain and the heavily overcast days. I don’t mind cooler weather, and we certainly have our fair share here. What has been surprising to me though, is that once summer hits, it gets weirdly hot and sticky. Not breezy yet sweaty like you’re in the Bahamas or even freakishly hot and humid like Texas, it’s more in the undecided middle. With thoughts creeping up on you like “It’s 8:30 in the morning, why is my makeup melting off?”, “It was 83 degrees yesterday and today it’s 56 degrees. Do I need sunblock or an umbrella. Help me out universe.” and “10:00 at night and 86 degrees… That makes sense…” Needless to say, I have decided to embrace the weird on and off weather and get out in the sun while I can catch it. Plus, getting out of the house and exploring the area around you is my favorite part of living in a new place. There is so much undiscovered territory and that makes me feel like Casey and I are Lewis and Clark.
This just in: Apparently there is this new thing that is all the rage… Geocaching. Up until about a week ago, I had no clue that this activity and it’s ever growing community even existed. I was reading a few articles about amazing activities to do out here during the summer and there it was. I brought this up to my mom, and in an instant she became cooler than me. She told me “Oh yeah, Geocaching. It’s all the rage with four wheeling people.” When I questioned how she knew this, her only reply was “I know things. I’m hip.”. Thanks mom. If you are not in with my mother and you don’t already know what geocaching is, it’s a really simple idea. Like treasure hunting for adventurous grown ups, there are boxes hidden all over the place. Ranging in size from film canisters to storage tubs, they are out there just waiting for you to find them. It amazes me that there are some hidden by places I walk every day. You would never in a million years know that there was something there yearning to be found.
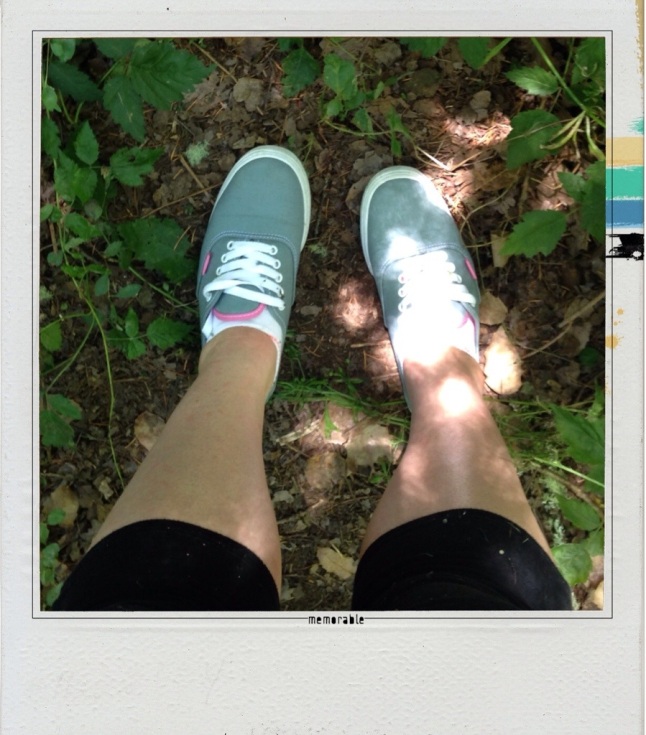
I downloaded the app Geocaching by Groundspeak Inc., signed up for the service (we did the free one, just in case we decided that we were less than thrilled with the activity, I didn’t want to waste ten bucks) and we planned our day out. We dressed in “forest tromping” attire, close toed shoes, sunscreen, hair up, sunglasses on; and went about our way. As a good tip here, we were not as prepared as we thought we were. I don’t know how it goes in other places, but here in Washington, the majority of these boxes are in the wilderness. We should have had full length pants, long socks, long sleeved shirts, visors, bio suits like the ones in Outbreak, gallons of bug spray and a basic knowledge of what bugs we were to encounter. We had none of that.
20140706-183004-66604512.jpg
As you can see, I was wearing capri leggings. Let me tell you something. Nothing makes a colony of ants happier than seeing some bare skin coming their way. If you look close enough, you can see their wrath in the form of bites all over my legs. We really should have known better, and dressed better. Next time, we will have ample amounts of bug spray, believe me.
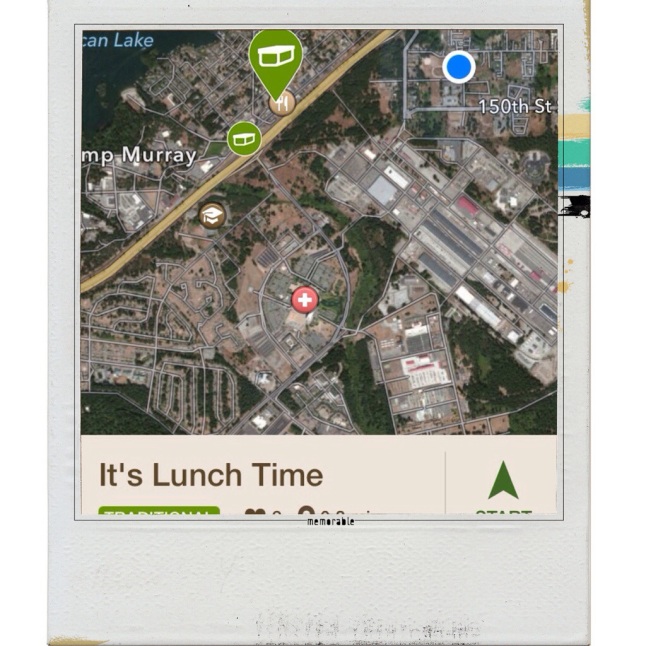
Anyways, back to the adventure. The app is pretty straight forward. It gives you a map of your current location and all of the available geocaches nearby. With each available cache, there is a description that goes along with it. A difficulty rating (ranked by physical toughness as well as what Casey likes to call “Sherlock skills”, or deductive reasoning), a terrain rating (gauging basically how much sweat is going to be pouring out of you body as you go along), and the size of the cache itself (they range from extra small to extra large). There is also a short entry about the location or cache. This tells you if it is in a series, if there is a theme, or some general information about what is going on with that specific site. There are also two other helpful tabs along with the description. A hint ( in case you get extra stuck), and my favorite: the review and log page. This shows you everyone who has found that cache and what they have to say about it. Helpful hints like “Beware the muggles!” (People who are around the area, but not participating and may call the fuzz for you looking shifty…) or “Mammoth ant hills all around!”. Things that are generally good to know. The last feature is a log option. This lets you mark the cache as ‘done’ on your map, as well as leave a comment for others to read.

20140706-184214-67334022.jpg
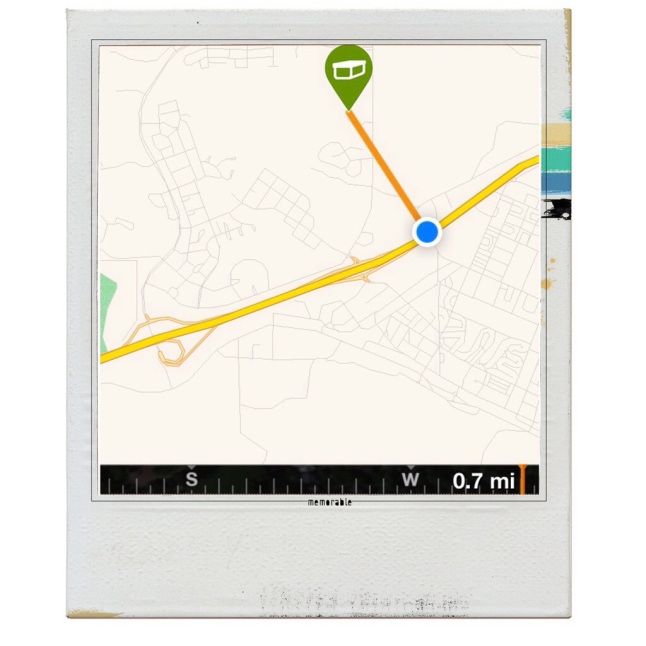
There were not a ton by our house so we drove out a bit to DuPont. You pick a destination and the gps and compass take over for you. Leading you as close as possible up to 30 feet.

20140706-184540-67540091.jpg
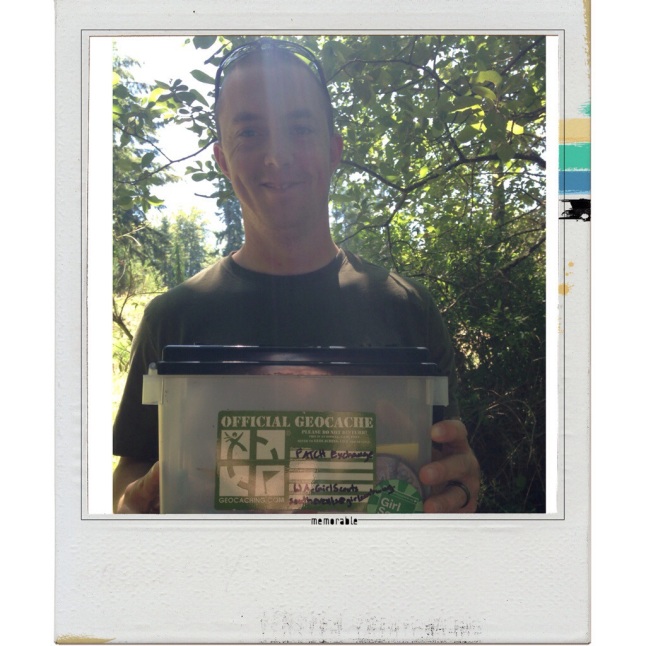
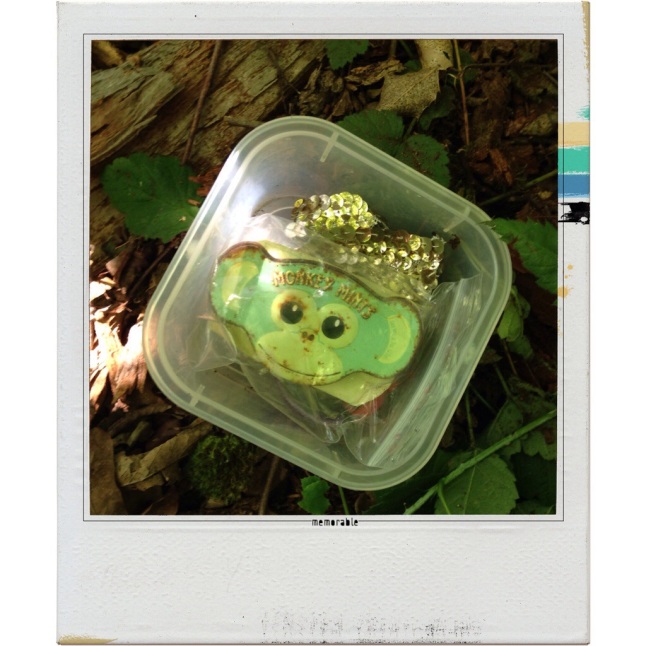
Then you get to looking!! Searching high and low and everywhere in between. Outside of the joy of actually finding a box, another excitement is that they are filled with objects. Items left by other searchers, trade items and trackable items. You can bring your own items to swap in or just enjoy the hunt. There are log books that you sign, and it’s amazing to see all the names of those who came before you and also conquered the search. Our first go brought us outside of the Girl Scout headquarters.

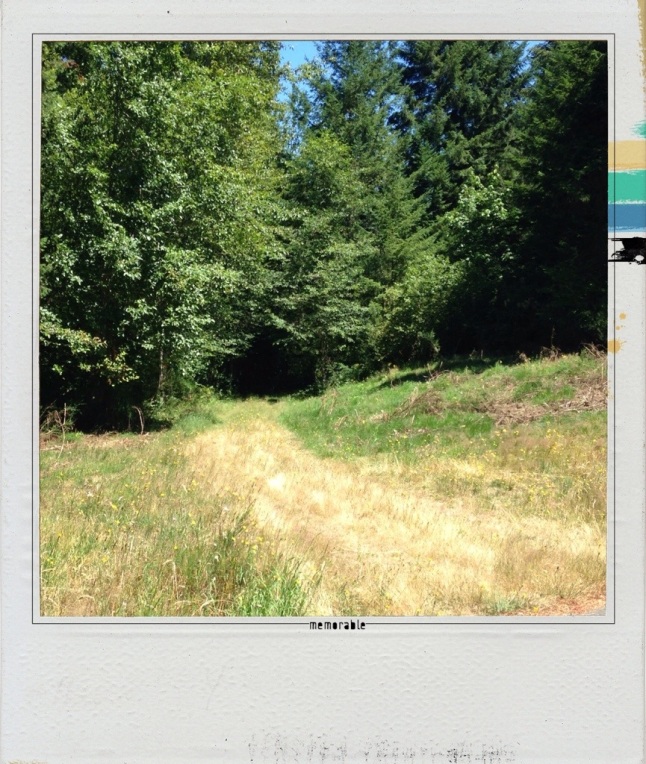
20140706-185526-68126235.jpg
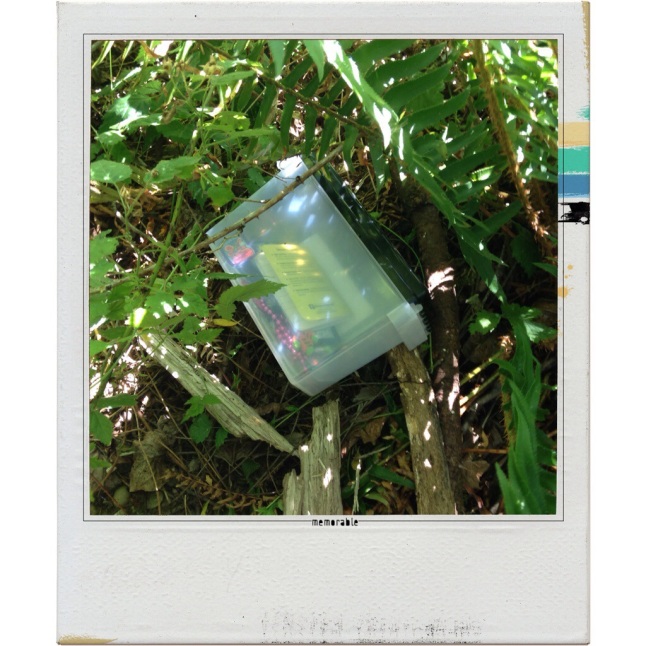
It looked like an ominous tunnel to Wonderland to me. But it turned out that our first search was rather easy. After only a few minutes of searching, we found our first cache! Tucked under some ferns and out of sight.
20140706-190058-68458139.jpg

20140706-185839-68319824.jpg
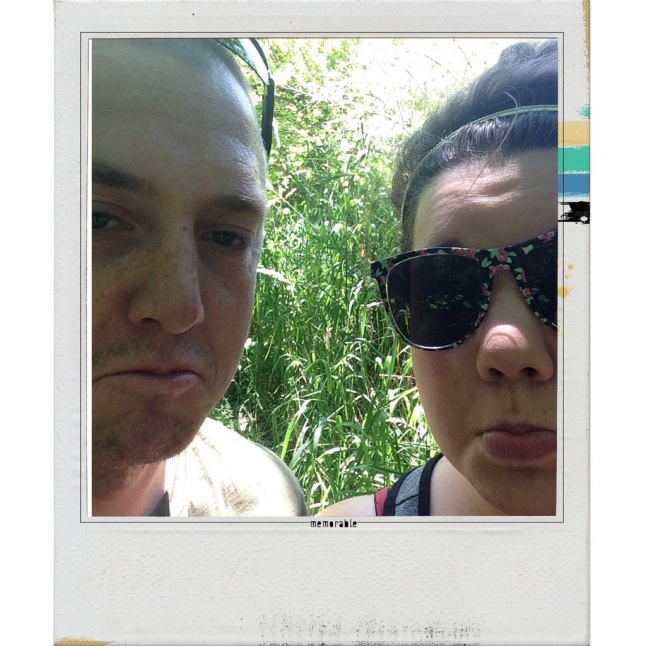
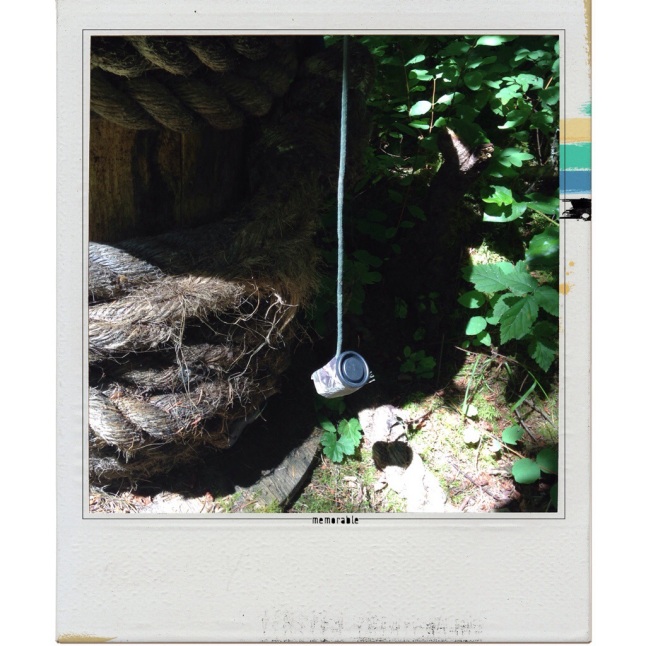
As you can see, we were very happy. I logged our find in the app, left a little keepsake , and away we went. We did a few more around the area, stumbling through brush, under trees, over fallen logs, around massive spider webs and all over the place. Something I found really fun is that some of these caches have themes or series. We stumbled upon a Paul Bunyan series with giant objects hidden instead of boxes full of goodies. These were really cool, and when we have a bit more time, I want to complete all of the tracks in that series. There were couple times that we got really frustrated. Either we couldn’t find the spots or the person who posted the caches didn’t put in the correct coordinates. Those times were particularly upsetting because you knew that you were so close, but a world away. We searched for a particular cache for over a half an hour before giving up. Needless to say, we were not pleased.

20140706-191001-69001542.jpg
However, We did have some success after that. But as the afternoon wore on, the hubs got hungry and with the ever swelling of my legs (complements of a rather nasty ant hill I may or may not have fallen into…) we decided it was best to stop for the day.

20140706-191528-69328204.jpg

20140706-191527-69327118.jpg
All in all, we had a fabulous afternoon trying our hand at geocaching. We have big plans for turning this into an EPIC ongoing summer adventure. It gets us out of the house and doing something very different than our usual norm. Just some advice: If you try to get ahold of me on a sunny weekend afternoon, I won’t hear you. I’ll be waist deep in some long grass, paddling a row boat out to a tiny island or climbing up an ancient, moss covered tree. I’ll be busy exploring. I’m very excited about this newfound adventure and will try to keep the you up to date on our outings!!
I am looking for someone to share in an adventure that I am arranging, and it’s very difficult to find anyone.’
I should think so — in these parts! We are plain quiet folk and have no use for adventures. Nasty disturbing uncomfortable things! Make you late for dinner!
J.R.R. Tolkien, The Hobbit

“Those are super old and ugly…”

I’ve been trying to do a “revamp” project every month. I don’t have as much free time as I once did, so I have to plan out things in advance and wait until I can squeeze everything in into a rare weekend that I have off. I had such a time today. After a jammed packed morning at work, I took a little time to wander on down to my local Hobby Lobby. As a side note, I absolutely love Hobby Lobby. They have amazing sales every week, and the app I have on my phone allows me a few 40-60 percent of regular item coupons every couple weeks. When ever I am getting into a project, I search the local
adds and websites for the greatest deals. In regards to that diligence, I finished this project for a little under $25.00. Which is amazing.
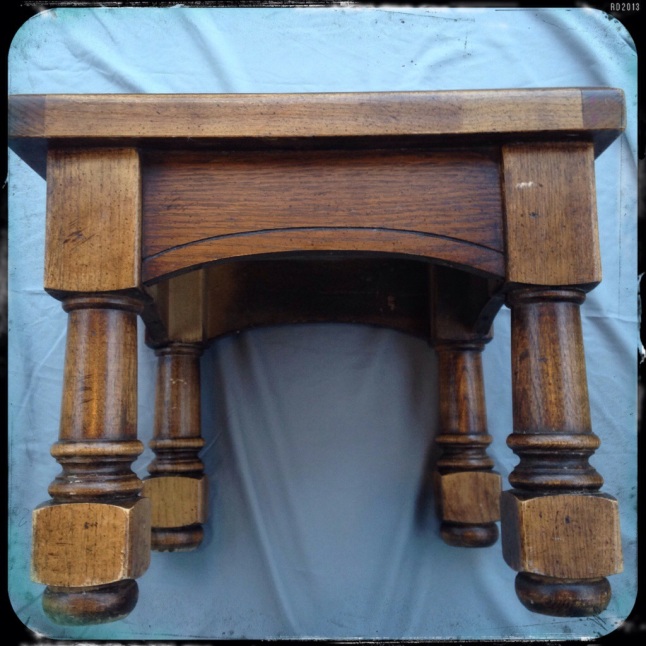
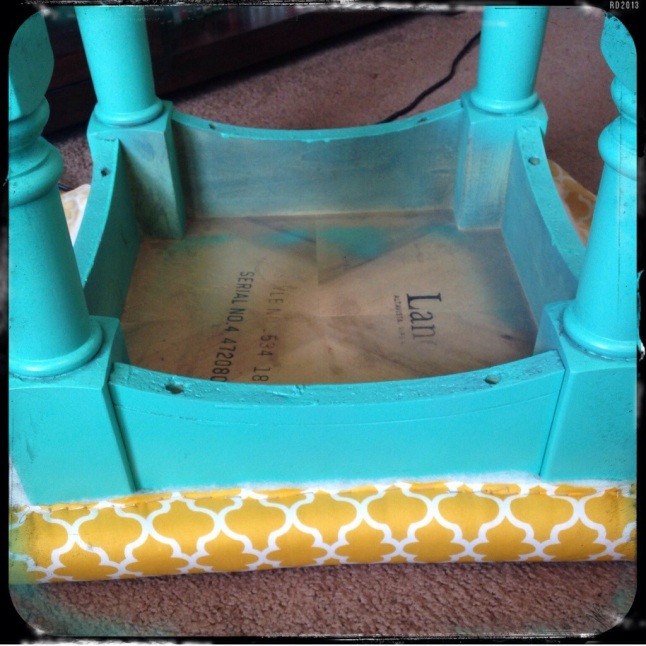
The project I chose to undertake this month was redoing a couple of old end tables I have and turning them into stools. These tables are older than me, as they belonged to my parents when they were first married. I used them in my room all though my youth filled days, and finally carted them out with me on our latest move to Washington. For as old as they are, they are in pretty good shape. They don’t have any chips or dents or major scratches. There is the wear and tear of over 25 years, but that is to be expected. All in all, they are great little guys.
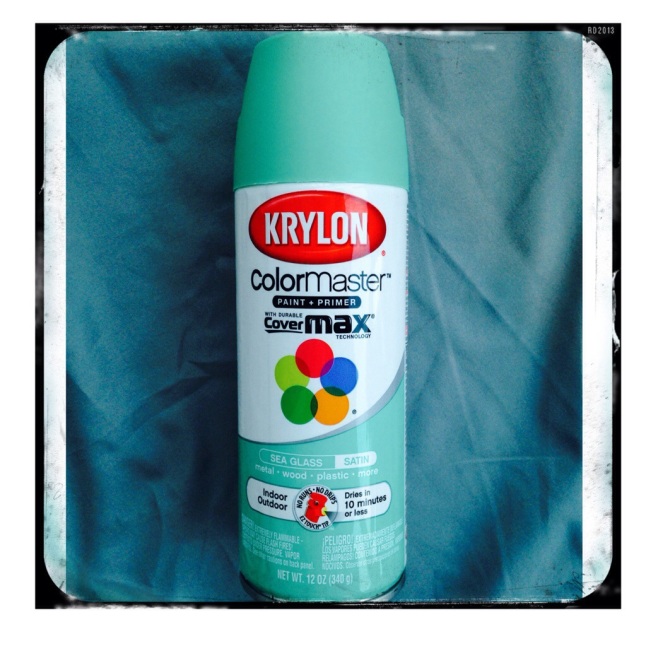
My husband wanted to take part in my latest project. I do so many and he never really get to have any say in what goes on, I tear through the house changing this and that, and he just kind of goes with the flow. This time was a little different. We went to the store and he picked out the color he wanted. It was a little brighter than I had in mind, but he was really invested in this choice so we went with it. He chose Krylon Color Master in sea glass. It’s a really pretty teal/green that goes great with some other accent pieces that we have in the living room. And BONUS! it’s a little over three bucks a can.

20140628-204323-74603375.jpg
I set up a little area on our front porch with a drop cloth and got to work. I usually prefer to paint out on a tarp in the backyard, but the grumpy beautiful weather did not allow me or do so. I cleaned them up and sanded down the rougher spots.
20140628-205005-75005270.jpg
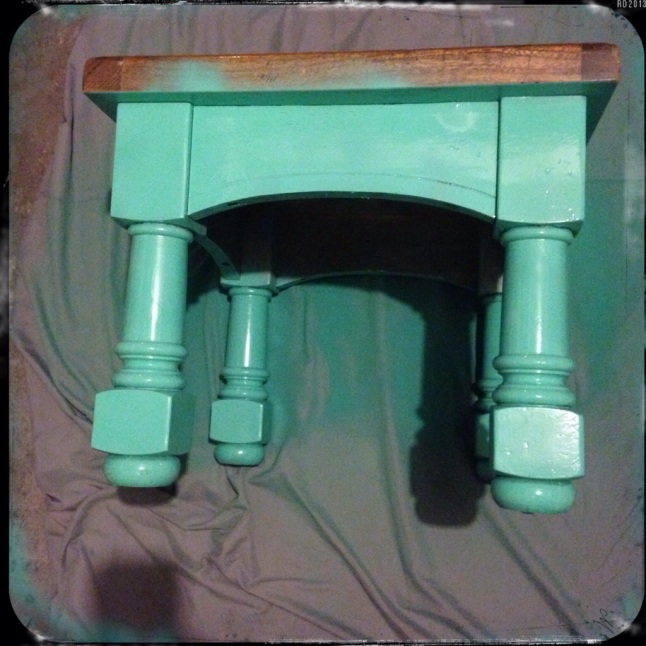
Then I started to paint the legs. Now, I am not a patient person when it comes to paint. I get antsy and need to add a new coat like now. The great thing about this line of Krylon is that it is paint + primer and because of this, It dries really fast and has great coverage.

20140628-205342-75222000.jpg
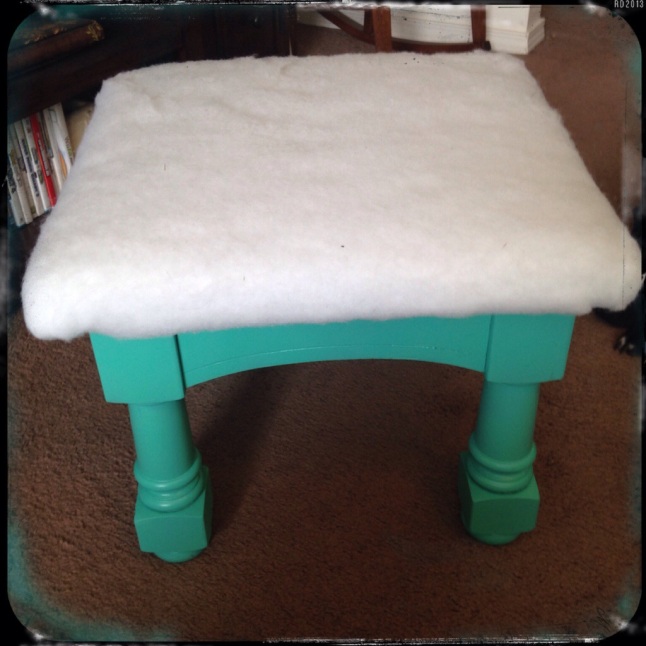
It took about three light coats to cover the entire areas that I wanted. For this project, I didn’t dwell on the perfect coverage. I kind of like the worn, lived in look of furniture. It goes right along with the oh so popular look of things nowadays. If I had a few nicks and areas that weren’t perfect, I let it slide. I think it came out great.
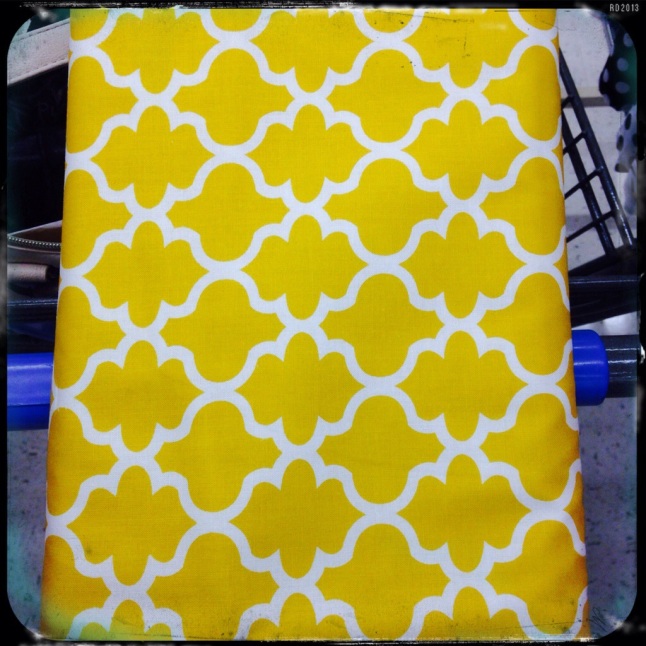
Now came the fun part. FABRIC! Once again I went into my friendly Hobby Lobby and picked up a great design as well as some batting. Again, props to Hobby Lobby for being so amazing. I got this fabric on sale at $4.30 a yard and the batting (with my 40% off coupon) ended up being about $7.50. What a steal!!

20140628-210420-75860100.jpg
Great little story about being at the fabric counter: I took a picture of the freshly painted table and brought it with me to compare and match up a print that I liked. The woman at the counter asked me what I was making, and as I explained it to her, I showed her the picture. Her eyes went cartoon style large, and told me in all seriousness “Those are super old and ugly… Did you find them on the street or something? I wouldn’t want them in my house…”. As delightful as I thought this statement was, I held back my retort of “Well, you are old and ugly!”, or something equally as childish. I smiled, gave a polite laugh and moved on. It was a great start to my day.
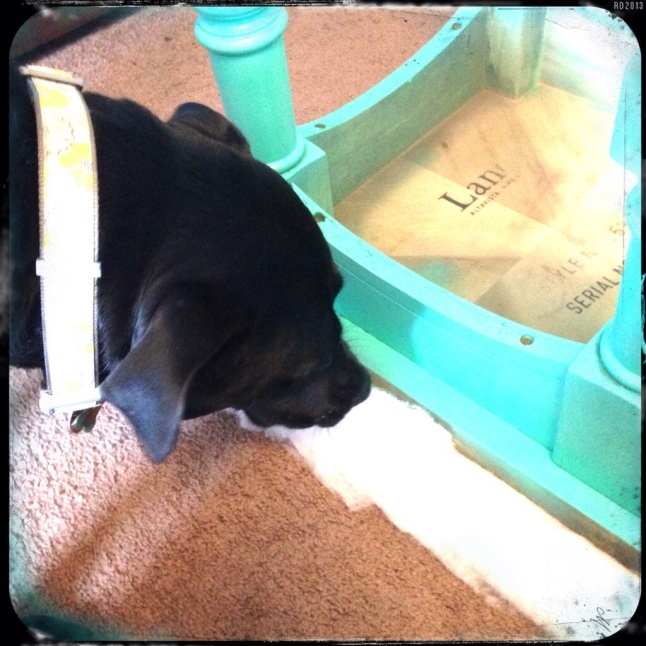
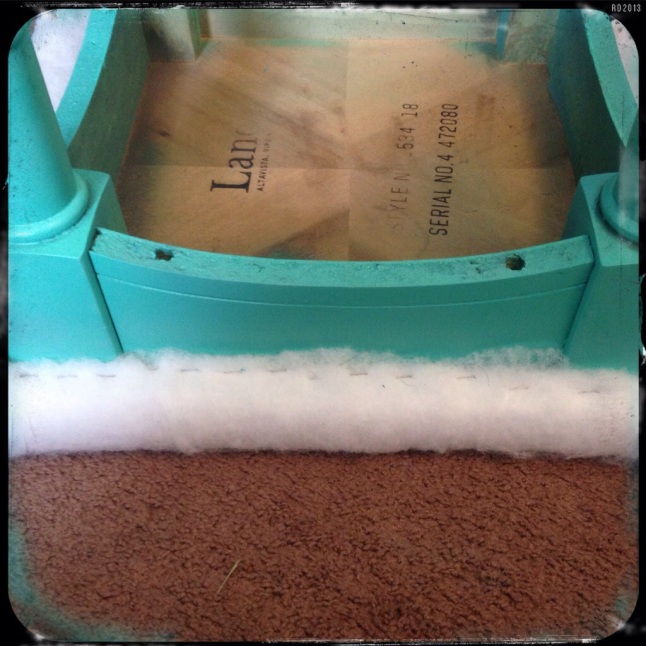
I returned home and got down to business getting the batting on. I rolled out what I needed from my giant batting supply. I didn’t want it to be too thick and puffy or thin and flat, and with the help of my trusty assistant, got the perfect amount that I wanted.

20140628-211646-76606488.jpg

20140628-211837-76717256.jpg
After fixing what Paisley decided needed to be pulled out with her teeth, I pulled it around the table and stapled it close to the seams of the top and the base. I used my heavy duty staple gun and the process was fairly quick.
I did all side and flipped it over to find that it had a great cushion to it. I was pleased!
>
20140628-212631-77191665.jpg

20140628-212632-77192724.jpg<br />
After that, I simply ironed out my fabric, and did the same process as I did with the batting.

20140628-212946-77386642.jpg

20140628-213134-77494167.jpg
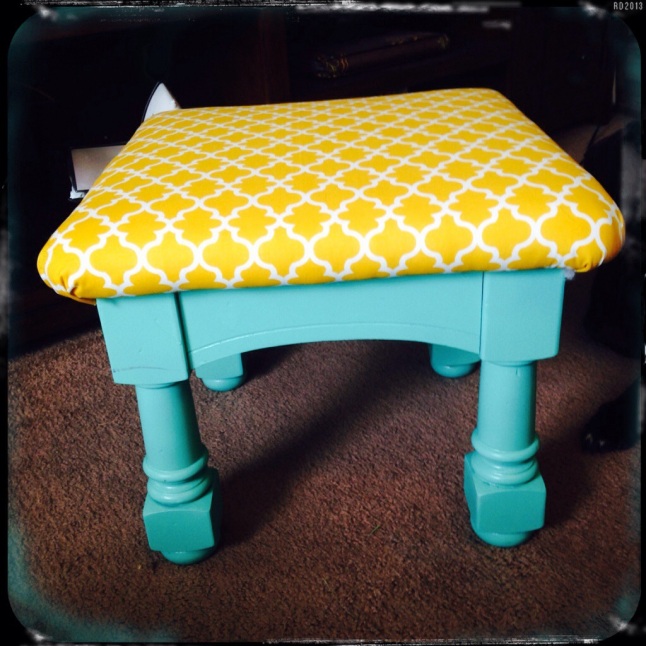
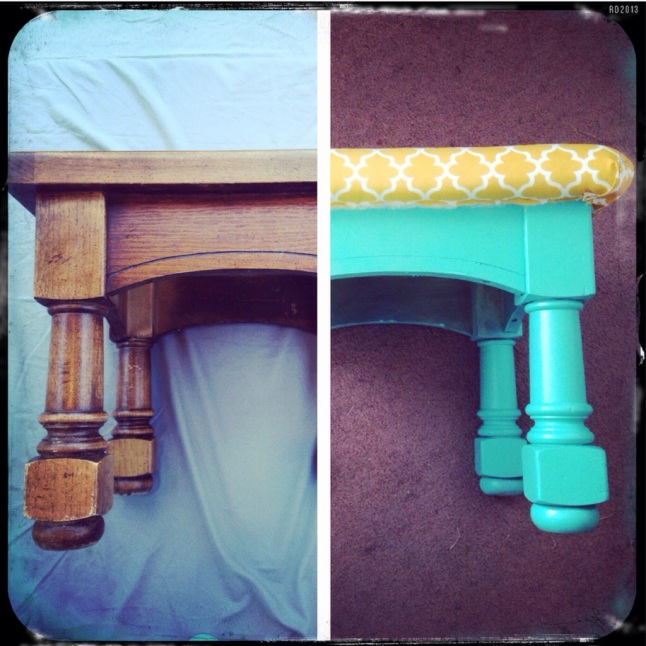
After trimming down the edges with an exacto knife, I gave it a little scotch guard treatment and all was done!! I did this to both the tables and I have to say. They really look great. They add a little flair here and there in our living room and have a fun, cozy feel. I really like the color combinations that we ended up with and am very happy with the end result! Here you can see the comparison between start and finish. It’s a huge upgrade!

20140628-214429-78269547.jpg
I hope that this post gave out a little insight in how easy it is to recover and revamp furniture. It is one of my favorite projects to get my hands dirty in. Until the next adventure!

“That will melt your face off…” Part 1

In my 26 years if life, I have never been overly concerned about how I look. When all of your school days include a uniform and your job mostly entails hanging out in and around a swimming pool all day, there isn’t much room for being fussed about looking all that put together. In my later years, being presentable has become more important. (Grown up jobs… Am I right?)

Makeup for me in my younger years consisted of a sweep of drug store mascara, a little gloss, and for a couple of misguided middle school years, a bright flash of eye shadow. Now however, is a completely different story. I have fallen in love with high end cosmetics. Now, as I have said before, I am not the CEO of a Fortune 500 company. I have not won the lottery nor have been selling organs on the black market. Anyone who knows anything about quality makeup will tell you that it can be insanely pricey. As upsetting as this fact is, I have been determined to get the most out of my money. I have signed up for newsletters with different companies such as Sephora, MAC and Ulta, they like to send out coupons and offers almost weekly. I can usually find what I need, wether it be replacing my foundation when I run out or getting that fabulous new eyeliner that is blowing up the internet at a slight discount using these membership “perks” as well as trolling the clearance section, checking in at the end of the season, and browsing through the sale section of the websites.

I have been seeing quite a few blogs and articles about “makeup hacks” lately, and reading over them, I thought that I would try a few myself. I figure, if I could find a few products that wouldn’t break the bank and would be comparable to those trusty products I use all the time, I could feel awesome about being awesome and spend way less. I head out to my local Target and grabbed some products that were as close as I could get to the ones I used all the time.

Round One:
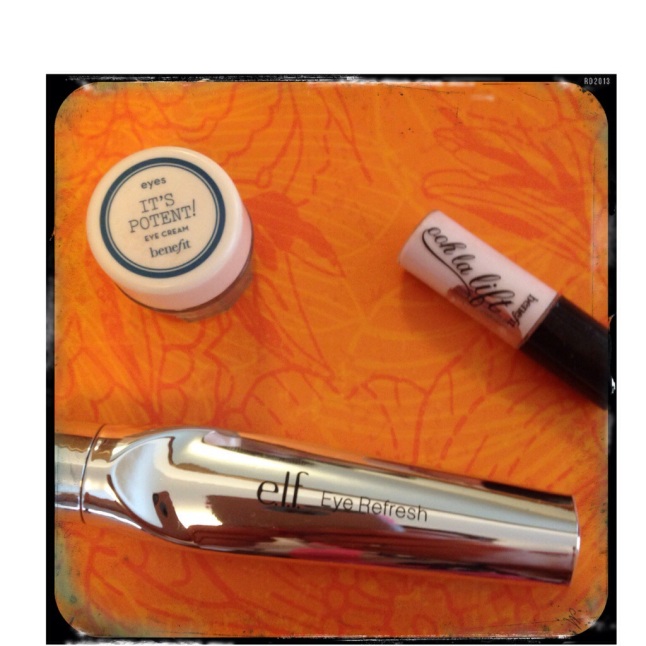
Eye Care20140624-125022-46222248.jpg
It’s Potent! Eye Cream by Benefit $31.00
Ooh La Lift by Benefit $19.00
Eye Refresh by e.l.f $3.04
All three of these products are made for reducing the puffiness and discoloration under your eyes. The two products from Benefit are a cream consistency whereas the e.l.f product is in the form of a liquid with a roller ball application. When I brought my things to the register, the checkout girl looked over each of my choices. As a side note, why do people who check you out always have to comment on every item? “I have these bagels at home, my husband hates them!”, “What are you making with this much broccoli?”, “This furniture polish smells horrible…”, so many things I don’t need/want to hear. Anyways, as she got to the Refresh she looked me dead in the eye and said “This will melt your face off, not a joke.”. That was a…
comforting thought… But, I got it anyway. In the end, I have to admit, the Eye Refresh worked just as well as the It’s Potent!. It was easier to apply and felt light on my skin. As a bonus, I still had all of my skin. Zero melting here. It didn’t work quite as quickly as the Ooh La lift though. With the Lift, my skin firms right up and brightens, making it look like I got a decent 8 hours of sleep (which I never do…). Between all three of these products, I prefer the Ooh La Lift, but for a little over three dollars, the Eye Refresh is a steal that I will continue to use. I approve!

Round Two:
Face Primer

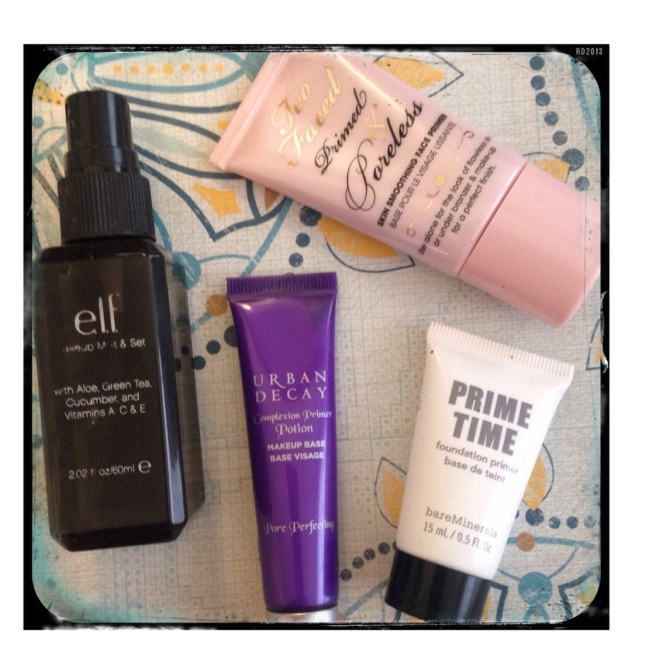
20140624-125330-46410783.jpg
Pore Perfecting Complexion Primer Potion by Urban Decay $31.00
Primed & Pore-less by Too Faced $30.00
Prime Time foundation primer by Bare Minerals $22.00
Studio Mist & Set by e.l.f $3.20
Now for primers. Primers are a God send for makeup. You don’t want to waste time in perfecting your makeup just to have it rub or oh, the horror, sweat off. I want my primer to feel weightless, like my skin is just extra awesome at keeping things on it. I have tried tons of primers, and all I can say is that there is a hierarchy in this category. I won’t go over all of them point by point, all you need to know is this: Prime time feels like velvet on your face. Hands down, this is the best primer in my arsenal. The others are good, and do the job, but Prime time feels weightless and smooth and amazing. I was intrigued by the e.l.f product, something that would allow me to do everything and mist it throughout the day to keep everything in place. But as the day went on, it occurred to me,: I shouldn’t have to fix and fix and fix. It should be something that works the first time around. I tried this product, and did not like it. I may as well spritz a little hairspray on my face, it would do just as well. For this, I would rather stick with a higher price for something that does the job. The verdict: Good day to you Mist and Set.

Round Three:
Blush

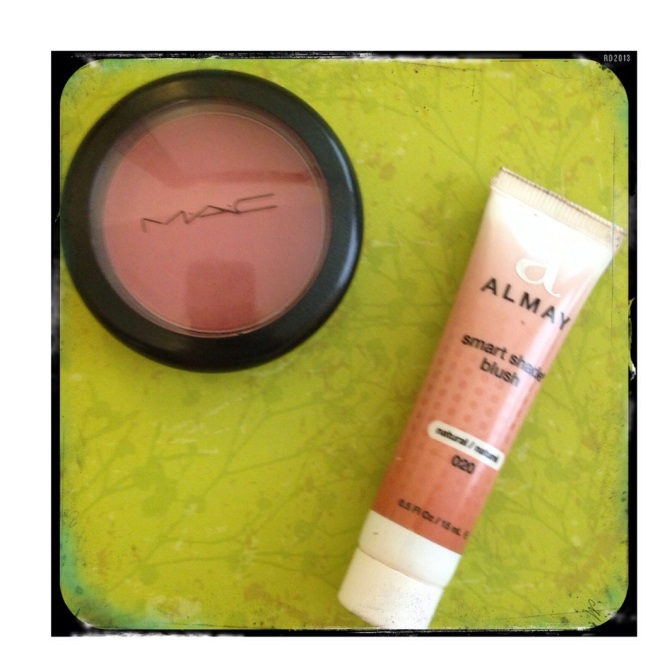
20140624-125720-46640258.jpg
Smart Shade by Almay $7.63
Powder Blush by MAC $21.00
I have been using MAC blush for a few years now. It always has a great texture and sheen, no matter the color. I have shied away from the “smart shade” products for awhile. I don’t like cream or liquid blush products, I find I have a hard time blending them in the way I want to and I just can’t find a shade I love. This product from Almay surprised me. The blush itself starts out white, and turns a pretty rose color as you blend it in, using the right brush, the effect is quite nice and something that I look for. My MAC products always last a long time, I fear that the small tubes from Almay won’t last nearly as long and it would be more expensive in the long run. I’ll keep it around for a “just in case I have to put blush on like right now, in the car, 10 minutes late for work” kind of day.

Round Four:
Concealer

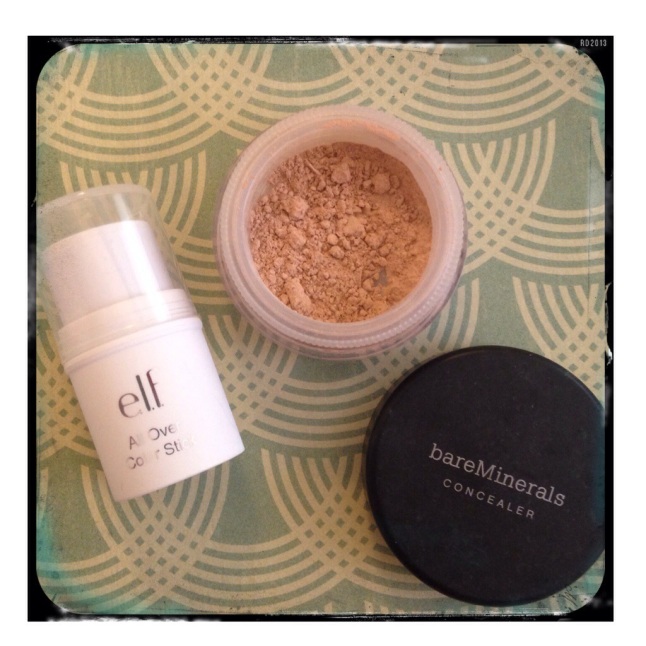
20140624-130719-47239167.jpg
Mineral Concealer by Bare Minerals $19.00
Cover Stick by e.l.f $1.08
Concealer. A girls best friend to hiding blemishes, red spots, and that lovely scar on your forehead that you got a couple days before going to your sophomore formal dance with that really cute boy. It’s a good thing to have all around. I have been using the full line of Bare Minerals for a few years now, and the concealer they have is the best. I use the powder line and it really is amazing the way that it blends into my skin and simply erases every mark I don’t want to show off. I tried out the cover stick, and… I did not live up to its name. It really didn’t cover anything. It had more of a translucent look to it with a little shimmer. It would probably be better suited for highlighting. At a dollar, I’m sure I could find something to do with it and not feel like a waste.
I have a few more items that I have to try out and add here. This has been an interesting experience, finding new products to blow my old and expensive ones out of the water. It’s like my own personal challenge to find the best that I can. Also, it’s a lot of fun getting all dolled up for no reason other than to try new products out. So far, I have only really liked one of the new picks. My “hacking” time has not been the most successful so far, but I still have a ways to go. Looking forward to another day and time filled with fantastic colors and beauty potions!

“Mercury?! That’s toxic!!!”

I love mercury glass. I don’t know many people who don’t. (And if you don’t, we can’t be friends anyways. Sorry. I don’t make the rules.). However, it is expensive. As a young professional/student/not making it rain kind of girl, I can’t always afford it. As much as that fact puts a cramp on my style, I was determined to find a way to have some awesome pieces that were doused with a little shine.
I brought this project up to my mom, and the first thing she said to me was “Where do you even buy mercury? It’s toxic! You are going to have to be so careful…”. As I am not a scientist, I knew this to be true. Also, I wasn’t actually planning on coating items in my home with dangerous metal to begin with.

Enter DIY mercury glass painting. I’m sure everyone has heard of this. It’s a technique that combines Krylon Looking Glass paint, a water/vinegar mixture and some light elbow grease. I found a couple lamps at my local thrift stores that were perfect for this type of project. Simple and understated, yet with a gorgeous antique feel. That is what mercury glass is all about. I spent a couple hours trying to find the best way to go about this project, looking at countless blogs and websites. It’s a delicate process, I wanted to get it right.

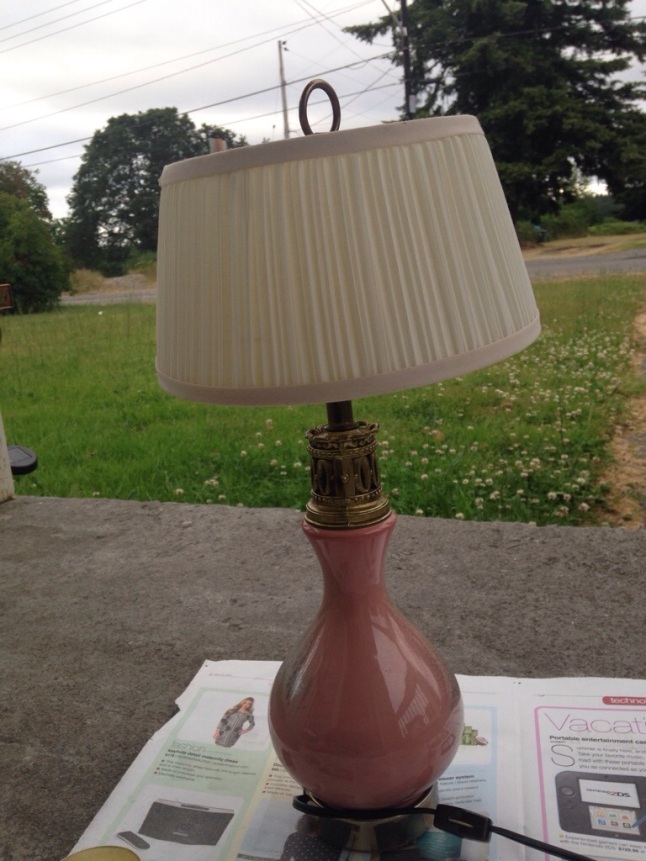
I started with a great little lamp that I got from my favorite thrift store in Gig Harbor.
20140619-152904-55744588.jpg
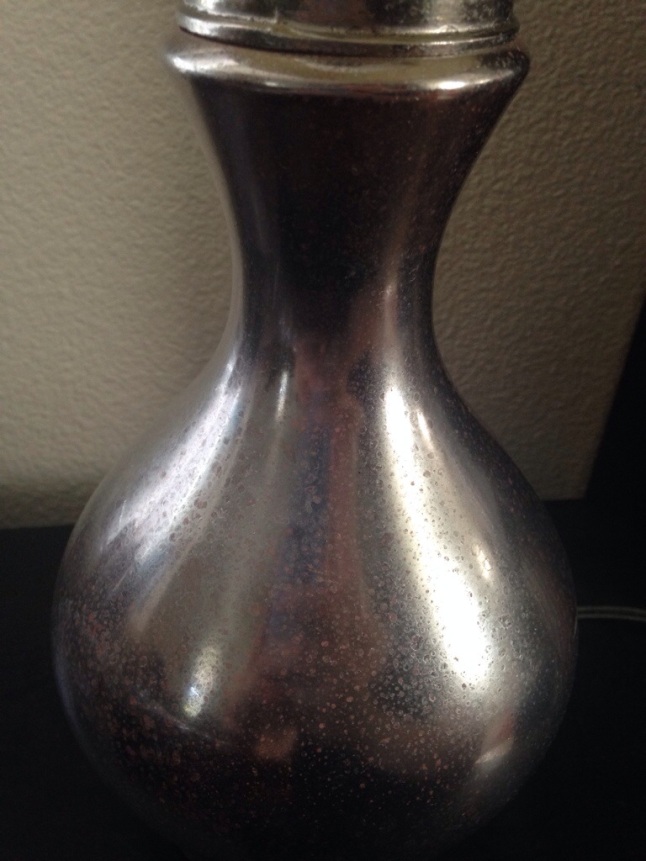
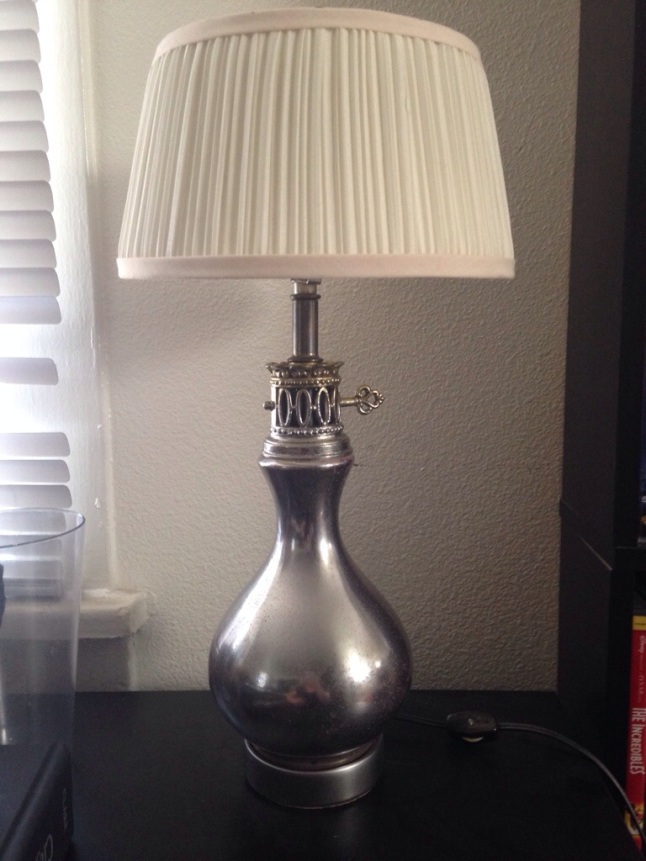
It was a sweet pink with a simple design. I washed it down, taped it up, and got down to business. Now, if you don’t know this technique, it’s simple enough. You spray an equal parts water and apple cider vinegar mixture on whatever you are painting in small sections at a time. You then spray a light layer of the paint and dab it with a cotton cloth. This paint is incredibly fascinating. You’ve heard the expression “like watching paint dry” right? Meaning something so boring and expressionless, you’d be better off watching the paint dry on the walls. When it comes to the looking glass paint, I would like to challenge this idiom. Watching this paint dry is one of the craziest things to see. It sprays on dull gray and changes to a mirror finish right before your eyes! I think I got more excited about that process than I was for the finished product. It was entertaining to say the least. The paint dries really fast, so you need to dab the cloth on it as soon as it does. This lifts up the trapped liquid under the paint to give it the “bubble” effect that come with mercury glass. It’s easy enough. The trick is to make small bursts of paint about 6 inches away from the surface. If it gets too thick, it doesn’t turn glassy and will run down the base. Spray too thin, and you will have about an eternity of time ahead of you painting the thing. Like I said, it’s a balance. After it was all said and done, I really liked how the base turned out.

20140619-154149-56509334.jpg

20140619-154148-56508498.jpg
I still have to paint the metal and find something to do with that drab and unsightly lovely shade, but it seems to be coming along nicely!! Now if I could only get this technique down to do something major… Like my car.

It’s a whirlwind…

The time has come once again for blogging. I have started, stopped, and restarted blogging so many times I have lost count. In theory, I like the idea of doing it. We live far away from friends and family, and some times I lose track of time. It may be a month before I realize that I haven’t talked to my best friend in a while. Blogging gives a placeholder to life. We can write something down and share it with our friends and family, giving them a way to keep up when we may not have the time to do so ourselves. This is my latest attempt to keep everyone up to date on what is going on in our lives.

For a short recap on what has been happening with us, we have relocated again! This time to Joint Base Lewis McChord in Washington state. We love it here so far!! It is the farthest west that Casey has ever been, let alone lived. It is just beautiful, so green and breezy. We live just outside of Tacoma, in a cute little rental. This is our first rental house, we decided against apartment living this go around. There just isn’t enough space for the dogs. They love it here. We have a huge backyard, our property lines up with a middle school and Paisley just loves barking at all the kids during recess and gym class. She is in heaven!

We have both been so busy with work, that we have not been able to get out and explore the areas around us as much as I would like. With so many places within a few hours or less, I wish we had the time to go adventuring every second we could. We have made plans to visit the coast over a long weekend and hit Portland here soon as well. We have spent a fair amount of time in Seattle, but not as much as I would like! One favorite part about being in Washington is that we have family visit us much more than when we lived in Texas and Tennessee. It’s such a fabulous feeling that I can just get in the car and drive home in half a day if I need to.

I haven’t been able to do as many projects as I was able to do in Tennessee this go around. I dip simply don’t have the time. My new plan of action is a project every month. That way, I can still get some creativity out and Casey doesn’t have to deal with my pent up energy as much. I’ll try to post some of that work as well as any adventures we go on.

I hope this time around sticks! We get to experience so much that it would be amazing if I could capture it here. Wish me luck!